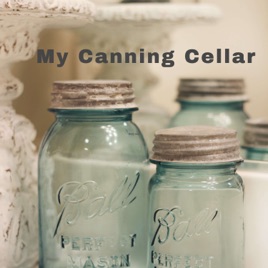
Advertise on podcast: My Canning Cellar
Rating
5from
This podcast has
46 episodes
Language
EnglishPublisher
Lois DebervilleExplicit
No
Date created
2021/03/12
Latest episode
2022/06/05
Average duration
6 min.
Release period
19 days
Description
how I can food for home use
Unlock My Canning Cellar podcast Email contact info,
Listeners & Audience details
Email contact information
Direct podcast contact details

Listeners
Audience numbers & engagement insights

Audience details
Podcast Insights

Podcast episodes
Check latest episodes from My Canning Cellar podcast
Pepper Jelly!
2022/06/05
This is season 2, episode 19, Pepper Jelly.
This recipe was done on the water bath cycle of my digital canner, and of course you can use your regular water bath canner. For equipment I also used a dutch oven pot, pot holders, a canning funnel, canning jar lifter, a sharp knife, a cutting board, measure cups and spoons, my small food processor, and a towel. I always put newly processed jars on a towel no matter what table I use, not only to catch the water but also to avoid shocking the jars on a colder surface.
The recipe I used is from a website I happened upon online, and I will put the link in the show description, and this is a Ball brand recipe. I didn’t follow the recipe exactly because I didn’t have the amount of honey called for, but do check out the website to see the original recipe.
The ingredients I used were
8 medium green and red peppers
1/2 cup jalapeño peppers, and I used store bought ones that came in a jar
1 1/4 cups apple cider vinegar
3 tablespoons low or no sugar needed pectin, and I had Ball brand
2 1/4 cups sugar
3/4 cups honey
I cut the tops off of the peppers, de-seeded the peppers, and then chopped them as small as I could. After the first 4 peppers, I wondered why I wasn’t using the food processor, so I then did. I trimmed around the cap of the peppers, using every good piece of pepper I could see.
I also put the jalapeño peppers in the food processor and gave them a few spins with the blades.
I put the peppers all into a dutch oven pot with the vinegar and pectin, and brought it to a rolling boil. A rolling boil is one that can’t be stirred down. Then I added the sugar and the honey, brought that to a rolling boil, and let it boil while I stirred it continuously for 3 minutes.
My jars had been setting in boiling water in the digital canner as I always put hot food into hot jars and into hot water, so I took each one out, filled them using the funnel to 1/4 inch headspace, wiped the rim off with a lint free cloth that was soaked in hot water, put the lid on and finger tightened the ring. After each jar was filled and back in the boiling water, I added enough hot water to cover the jars by about two inches.
The processing time for my elevation above sea level was 15 minutes. Using the digital canner, I didn’t have to do anything other than advance to the canning cycle when prompted, let it do its thing, and after the cool down period I let them set in the canner without the cover for another five minutes before removing, which is just to allow for some settling of the food so nothing spits out at me when I lift them out. If I had used my regular stove top water bath canner, I would have started timing the 15 minutes after the water started a continual rolling boil.
I ended up with 6 and almost a full 7th half pint jars. Normally I would be sure to have the correct head space, but I figured that I would just put the almost full jar in the refrigerator for more immediate use after processing.
The reason for needing the correct head space is that tested recipes are configured using a certain headspace, and if we have too little then the time allotted for processing may not be enough to rid the jar of the extra air, which can lead to food discoloration or a failed seal.
https://nchfp.uga.edu
https://www.nifa.usda.gov/about-nifa/blogs/usdas-complete-guide-home-canning
https://my100yearoldhome.com/pepper-jelly-and-jam-recipes
https://www.healthycanning.com/the-role-of-headspace-in-home-canning
Pork Chops!
2022/05/22
Welcome to my canning cellar, where my goal is not to tell YOU how to can, but rather tell you how ‘I’ can. I am an advocate of following guidelines such as stated by the National Center for Home Food Preservation, and I’ll put the link in the show description, although I also explore other canning groups and websites to study and sometimes copy tried and tested recipes. Like me, please do your own research to be sure you are confident in the safety of your home canned items.
What I used for equipment was my digital pressure canner, a serrated knife, a cutting board, a dutch oven pot, a strainer with another pot to strain into, a canning funnel, a dish towel, and I used pint canning jars.
My husband and I rarely eat pork, so the several packages we had, had been in the freezer for a few months and I wanted to clear some things out of the freezer. I had 7 bone in pork chops of different sizes, and I let them thaw out in the refrigerator. Once thawed, I sliced the meat from the bones and trimmed off most of the fat. I cut the pork in strips about 1/2 inch wide. I think the best part about eating pork chops on the bone is being able to use my teeth to get all the meat off the bones, but using a knife on the raw chops didn’t have the same result, it was very hard to get right down to the bone and also in-between some sections. So I covered the bones that still had meat left on them with water, and let that come to a boil and then let it simmer for half an hour. I strained the broth and ended up with me two full pints, plus a half pint of broth to which I added the boiled meat that then easily pulled off from the bone. The broth came out light in color, and it should be a nice addition to another canning project, I’ll probably use it in baked beans.
I raw packed the meat slices I cut off from the bones into pint jars and I did not add any liquid because raw packed pork makes its own juice.
The pork was cold, so to avoid shocking the jars, I packed the meat into cold jars, to one inch headspace, wiped the rims with a hot wet cloth, put on the lids, finger tightened the rings, and put into cold water in a pressure canner. I let the pressure canner heat up both the water and the filled jars without the canner lid on while my pork broth was still simmering as I was going to do all 6 pints in one batch, and just as I do cold food, cold jars, cold water, I had to do the hot food into hot jars into hot water.
Normally plain broth does not need to be processed as long as meat does but I wanted to do just the one canner full. I ended up with 3 pints of meat, one pint of broth with the boiled meat, plus the two pints of pork broth all processed together for 75 minutes, and for my elevation I used the 15 pound weight.
I thought I had packed it fairly tightly but like some of the meat that I have canned, it shrunk. I am still working on always finding that sweet spot of meat to headspace ratio after processing, which hasn’t easy when the jars are quite full before processing.
I learned that the reason for specific headspace is that when processing times have been determined, it allows for that certain definitive headspace. Extra headspace is not accounted for in those processing times. If too much headspace is allowed, not only can the food discolor, the jar may not seal properly because there will not be enough processing time to drive all the air out of the jar.
There was no water added to my raw pork, because there’s a lot of water in pork. A 4 ounce cut of pork will turn into 3 ounces once it’s cooked. A 3-ounce serving is about the size of a deck of cards.
https://nchfp.uga.edu
http://foodofhistory.com/2017/03/pork-chops/?doing_wp_cron=1653189194.3461968898773193359375
Dilly Beans!
2022/04/25
Welcome to my canning cellar.
My purpose is not to tell you HOW to can, but rather tell you how 'I' can. Please do your own research to find the canning processes that make you feel the most confident and safe.
This is the original recipe as given to me to make 4 pints.
2 pounds green beans, washed, ends trimmed
brine:
2.5 cups vinegar
2.5 cups water
1/4 cup salt
into each jar:
1 teaspoon minced garlic
1 teaspoon dill seed
1/2 teaspoon red pepper flakes (will be kicky, can be left out or reduced)
Bring brine to boil, let cool. Fill each pint jar with as many beans as possible. Top with brine. Use de-bubbler to remove air bubbles and displace beans, top with more brine if needed, to 1/4 inch headspace. Wipe rims, put on lids, rings, then into water bath and process for 10 minutes after the water comes to a constant rolling boil.
Let flavor develop for at least two weeks before eating.
I'm at just over 1000 feet above sea level so I always add 5 minutes to my pint processing.
National Center for Home Food Preservation
https://nchfp.uga.edu/
Mushrooms!
2022/04/11
Welcome to my canning cellar!
This is where I don’t want to tell you how to can but rather tell you how I can. Everyone has to do his or her own research and use the information that makes them feel the most comfortable and confident. I utilize the guidelines put out by the national center for home food preservation which I’ll link to in the show description. I do, however, research other tried and true canning ways and decide which seems safe to me and which don’t.
So, season 2, episode 16: mushrooms. We aren’t big mushroom eaters and historically whenever I bought a package, most would go bad before getting eaten. But when I recently saw them on clearance, I bought three one-pound packages of sliced white mushrooms. The store worker was just putting the clearance stickers on them so I knew they would be ok.
So what I used for ingredients were simply those 3 pounds of sliced white mushrooms, and water. I don’t buy distilled water for any of my food canning projects, I just use the town water from the tap.
For equipment I used a large bowl, a large strainer, a dutch oven pot, a slotted spoon, a smaller pot for boiling water, 8 half-pint jars with lids and rings, a debubbler, and a jar remover.
I first soaked the mushrooms in cold water for ten minutes and that was to remove any extra dirt. Then I drained and rinsed them again, then drained and put into a dutch oven pot, covered with water, and brought that to a boil. It boiled for ten minutes. I also boiled some water to use in topping off the jars.
The directions did not say to drain these after this step but I did anyway just to feel more confident about their cleanliness.
I packed 8 half-pint jars with mushrooms, filled the jars with the fresh hot water, used the debubbler around and in the middle of the mushrooms, and topped them off with more hot water to the one inch headspace. If you don’t have an official debubbler or can’t find yours like sometimes is like my dilemma, you could use a thin handle wooden spoon or a chopstick. I never use a knife or anything metal to avoid shocking the glass jars and maybe breaking one.
I then wiped the rims with hot water, put on the lids and finger tightened the rings. I pressure canned them for 45 minutes.
I have rarely bought mushrooms as I said before because my husband usually won’t eat them. But something about smelling their rich aroma as they boiled for the ten minutes has made me want to explore using them more often. I know mushrooming is a huge secretive deal to some people. I once was introduced to an elderly woman for whom I was to be her companion/caretaker, and the first thing she told her niece who was introducing us, was ‘don’t tell her where I go mushrooming!’
Some interesting facts, at least to me, that I found online is that the mushroom capital of the world is said to be Kennett Square, Pennsylvania, as it produces the most fresh cultivated mushroom yearly. Some of the earliest commercial mushroom farms were in French caves during King Louis the 14th’s reign of 1638 to 1715.
There is a honey mushroom that covers 3.4 square miles of land in Eastern Oregon’s Blue Mountains, and it is said to be the largest living organism ever found.
Thanks for visiting my canning cellar. Talk soon. Stay safe.
https://nchfp.uga.edu
https://www.healthycanning.com/canning-mushrooms#wprm-recipe-container-14948
https://www.mushroomcouncil.org/all-about-mushrooms/history
French Onion Soup
2022/03/27
French Onion Soup!
What I used for equipment was a large dutch frying pan, a large stock pot, a cutting board, a sharp knife, a canning funnel, a de-bubbler, a two cup measure cup, dish towels, potholders, the jar remover tongs and I ended up needing 9 quart jars. I used the Presto digital canner, again not good with the planning, which meant I had to do this in two batches of four quarts with one quart left over for the next day’s lunch, and I used the pressure canning cycle.
The ingredients I used were 7 pounds of onions, 6 quarts of our own previously canned beef broth, 4 tablespoons of beef base and the brand I have is by Maggi, 4 teaspoons steak sauce and 4 teaspoons Worcestershire sauce, and four tablespoons butter.
While my husband peeled and sliced the onions, I got the broth going. It was very simple. I removed the solidified fat from the top of each quart of beef broth and emptied the broth into the stock pot. I don’t know if anyone else would have had to remove the extra fat, but because my husband can’t tolerate it I just didn’t add it.
I added the beef base, the steak sauce and the Worcestershire sauce.
I brought it to a simmer for a few minutes then shut it off.
I cooked the sliced onions in the butter in the dutch frying pan on medium low until they were translucent, and meanwhile I had my jars going through the warming cycle in the canner because I was going to be putting in hot food. It’s always hot food, hot jars, hot water OR cold food, cold jars, cold water.
When the onions were done, I measured two cups into each quart jar, filled with the broth, de-bubbled, and added more broth to one inch head space. I wiped each rim with a vinegar soaked paper towel, put on the lids and finger tightened the rings. I processed each batch for 75 minutes. I had some siphoning during processing but all the lids sealed.
When my processing is done, I always remove the canner cover and just let the jars sit for about ten minutes. This helps if any jars are really bubbling because it gives them that little time to settle down a bit. I have removed bubbling jars immediately and had them spit at me around the lids and rings in protest. And I always set the hot jars on dish towels to help avoid any shock of extremely hot jars on the colder work table.
The next day I removed the rings, washed the jars to remove any grease from the siphoning, and after they dried I labeled them and put them down in my canning cellar.
“When any vegetable is damaged, its cells are ripped open. The plant often then tries to defend itself by releasing bitter-tasting chemicals called polyphenols that can be off-putting to hungry animals trying to eat it. But an onion’s defense mechanism goes further, producing an even more irritating chemical, propanthial s-oxide, meant to stop the plant being consumed by pests.”
It’s been a while since I recommended Jamie’s amazing jar openers, which he makes using 3D technology. I absolutely can’t use anything else because my thumbs give me so much trouble. He gave me permission to put his contact info in the show description. I have no relationship with Jamie, just love his product.
Thank you for visiting my canning cellar. Talk soon. Stay safe.
https://nchfp.uga.edu
https://www.justapinch.com/recipes/soup/soup-other-soup/easy-pressure-canned-french-onion-soup.html
https://theconversation.com/why-onions-make-us-cry-and-why-some-dont-84486
Jamie’s jar openers: [email protected]
Chocolate Syrup (with Caveat). Organizing my canned goods.
2022/02/28
Thanks for visiting my canning cellar. This is where I don't tell you how to can but rather just how I can. Of course everyone will use his or her best judgement after researching.
http:/nchfp.uga.edu
Lettuce!
2022/02/13
Welcome to my canning cellar!
What I used for equipment was a dutch oven pot, my Presto digital canner, a cutting board, a serrated lettuce knife, a canning funnel.
What I used for the product was romaine lettuce, I can’t remember how much I had, but am thinking at least three bunches. I used 6 cups of apple cider vinegar, 2 cups water and 1/2 cup of pickling salt.
I mixed the brine mixture together and let it come to a boil, then let it cool down. Then I packed the lettuce very tightly into 6 pint jars and poured the brine into each jar to the inch head space. I wiped each rim with a vinegar cloth, put on the lids and finger tightened the rings. I don’t boil the lids, but I do wash and rinse them and then keep them in clean hot water until I’m ready to use them. I’ve seen many different approaches to lid readiness and I feel this is what I’m comfortable doing.
I processed the pints using the water bath cycle and let them process for ten minutes. Processing time starts after the water comes to a boil, and with the digital canner, I don’t need to keep an eye on it as the processing starts automatically when ready.
The lettuce of course is a green, and greens wilt. I was however surprised at how much it wilted because I had the jars really well jam packed.
Now this was 6 months ago, but my husband just opened a jar to try. He said it tasted like lettuce but in a vinegary greens way. He ate it plain like one would spinach. He likes a lot of vinegar taste so it was good to him, but I found it too tart for my liking. And even though the lettuce wilted up to about 1/2 way in each jar, I definitely would do this again.
https://nchfp.uga.edu/
https://www.epicurious.com/ingredients/varieties-and-types-of-lettuce-article
https://dpi.wi.gov/sites/default/files/imce/school-nutrition/pdf/fact-sheet-lettuce.pdf
Canning Rice
2022/02/01
Welcome to my canning cellar, season 2 episode 12. I don’t tell you how to can but rather how I can. Please do your own research as sometimes I will stray off into untested territories, and by untested, I mean by the USDA or the National Center for Home Food Preservation. I sometimes will go by the results from experienced home canners.
I had both white and brown rice and I canned them in separate jars as my husband prefers the white and I prefer the brown.
The ingredients I used were rice, just rice, oh and water to cook it in. I used three 1 pound bags of long cooking brown rice and three 1 pound bags of long cooking white rice.
The items I used were two large dutch oven pots, a measure cup, a long thin handled wooden spoon, a canning funnel, a jar lifter, and my digital canner.
I cooked each type of rice according to the package instructions. I did not rinse or drain either after cooking.
Using the canning funnel, I filled each warmed jar with the hot rice, and I used pint jars. Each cooked bag of white made 4 pints full and each cooked bag of brown made 3 pints full. At first, I made just one bag each, but for the second and last round, I cooked two bags of each at a time. The white rice was rather clumpy at the bottom of the dutch oven pot so I kept about two pints worth out and froze that. Rice freezes rather well.
After filling each jar I used the handle of the wooden spoon to both push it down and remove air. Even though I packed them pretty well, each jar ended up compressing a bit. I then wiped the rims with a vinegar paper towel, I finger tightened the rings and I fit 7 jars at a time in the Presto digital canner. I should’ve thought ahead and used my larger stove top canner to do more at a time.
I processed each batch at 20 minutes on the pressure canning cycle.
https://nchfp.uga.edu
https://www.foodandwine.com/news/7-things-you-never-knew-about-rice
Tomato Soup. 2021 Round Up.
2022/01/17
Tomato Soup!
tomatoes, probably 14 various sizes, whole, peeled, just top part of core removed
2 cups bottled tomato juice
1 onion, diced or minced as small as you'd like
9 tablespoons butter, divided
2 cups half and half
4 tablespoons flour
1 teaspoon minced garlic
1 teaspoon basil
3 tablespoons sugar
1 teaspoon salt
1 teaspoon pepper
For equipment I used a strainer, a dutch oven pot, my immersion blender, a wooden spoon, my digital canner, and ended up using 7 pint jars with lids and rings.
Put tomatoes and tomato juice in pot to cook down. Use immersion blender to smooth out. Add onions and garlic that were softened in 3 tablespoons butter, and then add basil, sugar, salt, pepper.
Make roux with half and half and flour in 6 tablespoons butter. Use immersion blender to smooth. Add to the tomato mixture.
I filled the warmed pint jars, wiped the rims, put on the lids and finger tightened the rings. I processed these using the water bath cycle for 30 minutes. It was very easy, the hardest part was the handling of the freezing cold tomatoes.
Sloppy Joes!
2021/12/20
Home canned sloppy joes!
The ingredients I used were 4 pounds ground hamburg, 2 cups chopped onions, 6 teaspoons Worcestershire sauce, 3 cups ketchup, 1/2 cup water, 4 tablespoons apple cider vinegar, 4 tablespoons brown sugar and 4 teaspoons prepared yellow mustard, not dry mustard.
The items I used were my Presto Precise digital canner, a canning funnel, a de-bubbler tool, a vinegar soaked paper towel, a jar lifter, and 5 pint jars with lids and rings. I also used the largest frying pan I have and mom’s old dutch oven pot.
First I got my jars warming in the digital canner, and put the lids to just rest in a pot of hot water just to soften up the rim material. I don’t boil my lids as my research says there’s no need to.
I then got all the hamburg cooking with the onions. I didn’t break the hamburg up as much as I did when I canned plain hamburg as I thought maybe this on top of pressure canning would allow the meat to stay a bit less mushy. I also didn’t cook the hamburg completely through, maybe about 90% done. Then I drained the meat and onions, keeping the drippings to add to the dog’s and cat’s food. I dumped the meat mixture into the large dutch oven pot and added all the rest of the ingredients and let it simmer for about ten minutes.
By this time, the warming cycle was done so I pulled out my jars one by one and filled them using the canning funnel. I left them just below the one inch headspace mark because experience tells me that it could bubble up quite a bit. I ran the de-bubbler tool along the inside of each jar and topped each off as needed. I got 5 full pints plus about 1/2 cup left over to put into the fridge.
I wiped each rim with the vinegar soaked paper towel, put on the lids, and finger tightened the rings. Because this is a meat product, I had to process the pints for 75 minutes.
Squash, Pumpkin, Meatloaf
2021/12/05
Welcome to My Canning Cellar, Season 2, Episode 9.
Green Tomato Salsa
2021/11/15
Welcome to Season 2, Episode 8
https://www.walmart.com/ip/Salsa-Mix-Mild-3-Of-1-06-Oz-Pouches/124953903
https://nchfp.uga.edu
https://www.streetdirectory.com/food_editorials/snacks/dips_and_sauces/history_of_salsa_sauce_the_mexican_connection.html
Podcast reviews
Read My Canning Cellar podcast reviews
Fun1894 2022/03/16
Easy listening
Very short episodes which don’t rely on a lot of extra chatter. Just tells how she cans without telling anyone else how she or he should can. Admits e...
slow but thankful 2021/08/31
My Canning Cellar
Canning made easy thank you Lois
I listened to the Venison and Hamburger one what a great idea 😊
trailkate 2021/03/30
Perfect podcast to learn about canning!
Listening to my canning cellar is like being in the kitchen along with Lois. She takes you step by step through each of her canning adventures. You ca...
DLeau 2021/03/16
Learning already!
Thanks for sharing your knowledge with us! I love the idea of giving us recipes and while I’m only three episodes in I have already learned a handful...
Trout Valium 2021/03/16
The adventure begins
We look forward to Lois’s adventure as she gets her radio voice and fills the pantry with a record setting selection of tasty meals
luluboone 2021/03/16
Informative in a story like flow!
I loved listening to this podcast about Lois’s personal experiences through canning. Her stories flow effortlessly and her guidance makes sense. I loo...
Podcast sponsorship advertising
Start advertising on My Canning Cellar relevant audience podcasts
You may also like to advertise on these Podcasts

4.4371061566
The Megyn Kelly Show
SiriusXM

4.888901269
Fearless with Jason Whitlock
Blaze Podcast Network

4.8118931000
Mind Pump: Raw Fitness Truth
Sal Di Stefano, Adam Schafer, Justin Andrews, Doug Egge

4.8102131585
Tara Brach
Tara Brach

4.541561215
Something You Should Know
Mike Carruthers | OmniCast Media

4.513841343
Strictly Anonymous Confessions
Kathy Kay

4.8292781897
Fantasy Footballers - Fantasy Football Podcast
Fantasy Football

4.62382612
Football Weekly
The Guardian

4.45387666
Two Judgey Girls
Two Judgey Girls

3.8258501152
The Viall Files
Nick Viall